Life goals are important for living a successful and fulfilling life as they provide us with direction and purpose and give us something to strive for. However, at times it can get overwhelming if you don’t have a system that can help you get some clarity.
LifeChanger will be your trusted friend when it comes to organizing your life goals and keeping track of your progress toward achieving them.
How to add a goal
Let’s see what steps you have to take when adding a goal in LifeChanger:
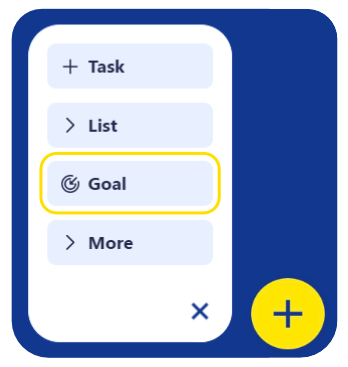
- tap on the + button on the bottom right side of the screen
- tap Goal
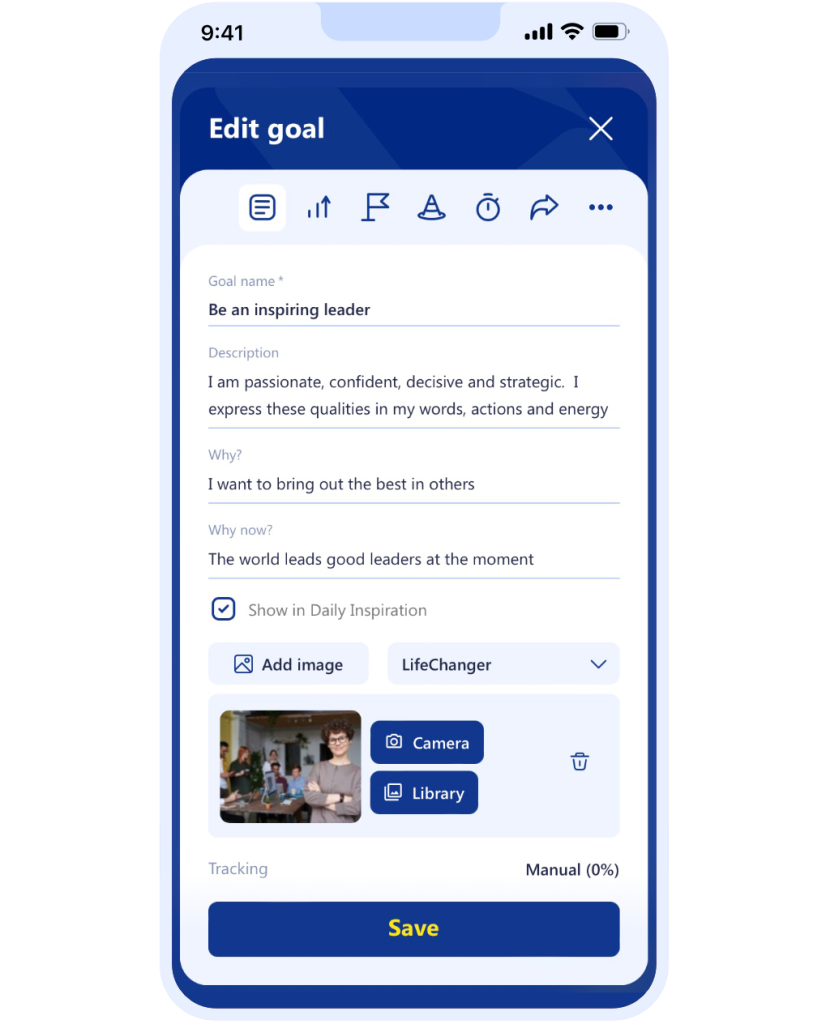
- name your goal (e.g. Be an inspiring leader)
- give your goal a Description. Best practises say you should write the Description in the present tense as if you have already achieved your goal. You can either type the Description or tap the Generate with AI button. Our AI will use the name you entered to provide a detailed Description and give some extra suggestions in a selector that you can add if you choose. You can edit the text afterwards to fine-tune it to your situation.
- Tap Next to view the Reasoning page. Here you can enter Why and Why Now you want to achieve the Goal. Again, you can either type the information or use our AI to produce it. You can also give a short description of your starting point – i.e. your current situation, prior to starting your journey to achieve your goal.
- Tap Next to view the Obstacles page. If you have identified any obstacles that might come across you in achieving your goal, make sure to note them and then think of a possible solution. Again, you can click Generate with AI to generate some suggestions.
- Tap Next to view the Milestones page. Add at least one milestone that can aim for to help you achieve your goal (e.g. Attend a masterclass on leadership). Later on, you can add action steps / tasks within each milestone. Again, you can click Generate with AI to instruct our AI to give you some suggestions.
- Tap Next to view the Image and Daily Inspiration page. A picture paints a thousand words, so add a picture to the goal that inspires you to reach it. The image will be shown when you view the goal in LifeChanger and, if you tick the Show in Daily Inspiration box, a slide for the goal will be added to your Daily Inspiration presentation (accessible on the main menu).
- Tap Next to view the Tracking page. Here you can choose how you want to track progress. Your options are: i) None – no tracking will be performed, ii) Manual – choose this if you want to indicate each day (or whenever you like) how far you are along to meeting your goal. When Manual is chosen, you can indicate if you want to use a Percentage scale (a slider will be shown so you can move your progress from 0 to 100%) or Absolute values (e.g. if you goal is to lose weight, you could set the starting value to be your current weight and the target value to be your optimal weight). iii) Auto – when this option is chosen, LifeChanger will calculate your progress based on the goal-related tasks you mark as Complete.
- Finally, tap Submit to save your new goal. Later, you can tap on it to open it again for editing.
When you edit it, you can select a start date and an due date for when the goal should be reached and you can share your goal with friend(s) or family member(s) if you choose.
Keep in mind that creating goals is the first step in the process, so make sure you read our article on how to manage and achieve your goals.