When can you receive notifications?
In order to enable notifications in LifeChanger, you first have to set a start date or a due date for each task or goal you’re adding to the app.
Add notifications
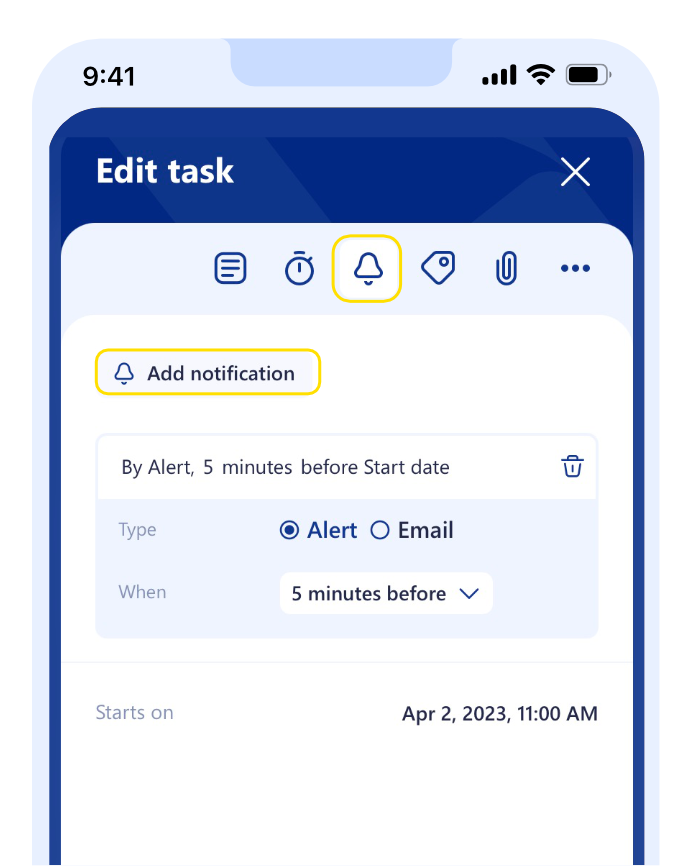
- To set up notifications, first, ensure your task has a Start Date or a Due Date
- Tap the Notifications card

- Click Add Notification
- Pick the type of notification (email or alert) and when you want it.
- Hit the Save button

Check the notifications panel
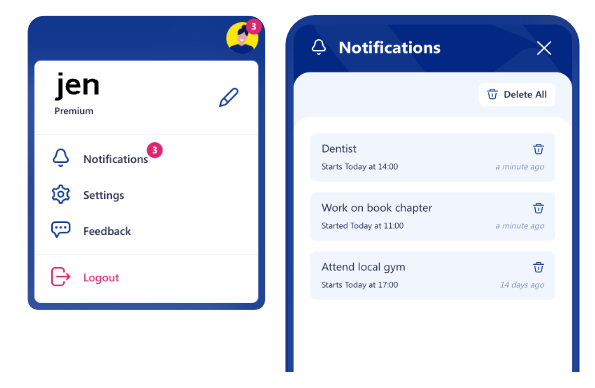
Notifications are represented by a bell-shaped button in the top right corner. When you have new notifications, the bell will show the number of unread notifications. To view these notifications, click on the notifications button.

Extra settings on your notifications
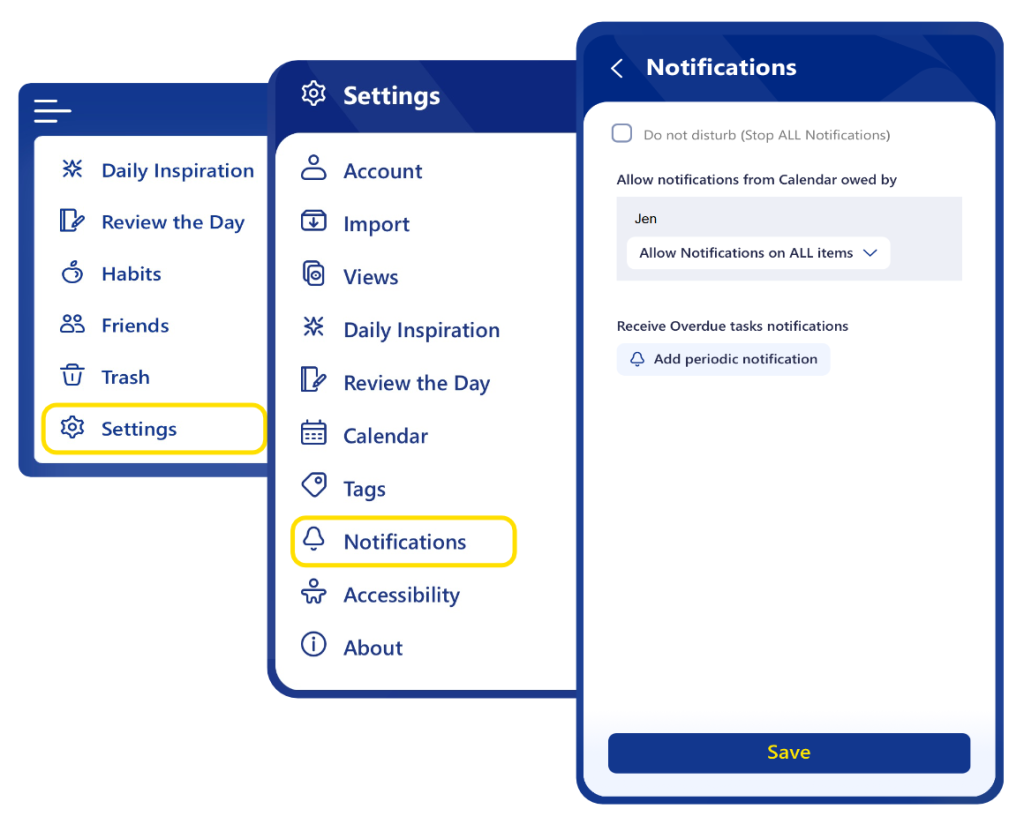
- Go to Settings on the main menu
- Choose Notifications
- Give your permission over what type of items from your Calendars you want to receive notifications
If you want to receive notifications for your overdue tasks that also have certain tags, you can customize your options by clicking on Add periodic notification.

Since LifeChanger notifications are so flexible, you can use them for many situations. For example, you could set up several reminders per day to notify you to take your meds or to take a moment to relax and breathe.

