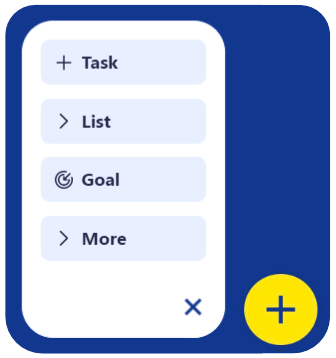
The 2 components that you’ll use the most in LifeChanger are Tasks and Lists.
Pre-installed with LifeChanger is your ToDo list and you can add other lists of your choosing – e.g. shopping lists, project lists, kids sports lists, etc. You can also create Lists inside other Lists and these are called sub-Lists. For example, you could have 2 sub-Lists called Grocers and Pharmacy inside your main Shopping list.
Add Tasks to your Lists. Tasks can be simple – like an item ‘Apples’ on your shopping list, or complex – like a project task with Images, Tags, Scheduling, Alerts, etc.
In addition to Tasks, there are other items you can add, such as Goals, Habits, Contacts, etc. Add these using the yellow ![]() button at the bottom right of LifeChanger or using the 3 dot button at the top right of any list.
button at the bottom right of LifeChanger or using the 3 dot button at the top right of any list.
More advanced users can add items such as Quadrants and Milestones, etc.
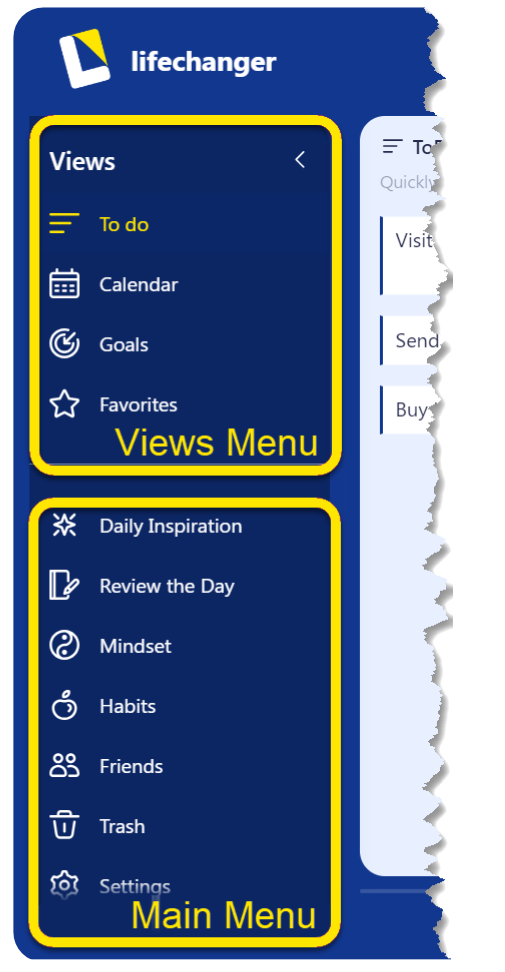
On your phone, the Main menu will appear when you tap on the  button at the top left and the View menu when you tap on the Views selector
  at the bottom.